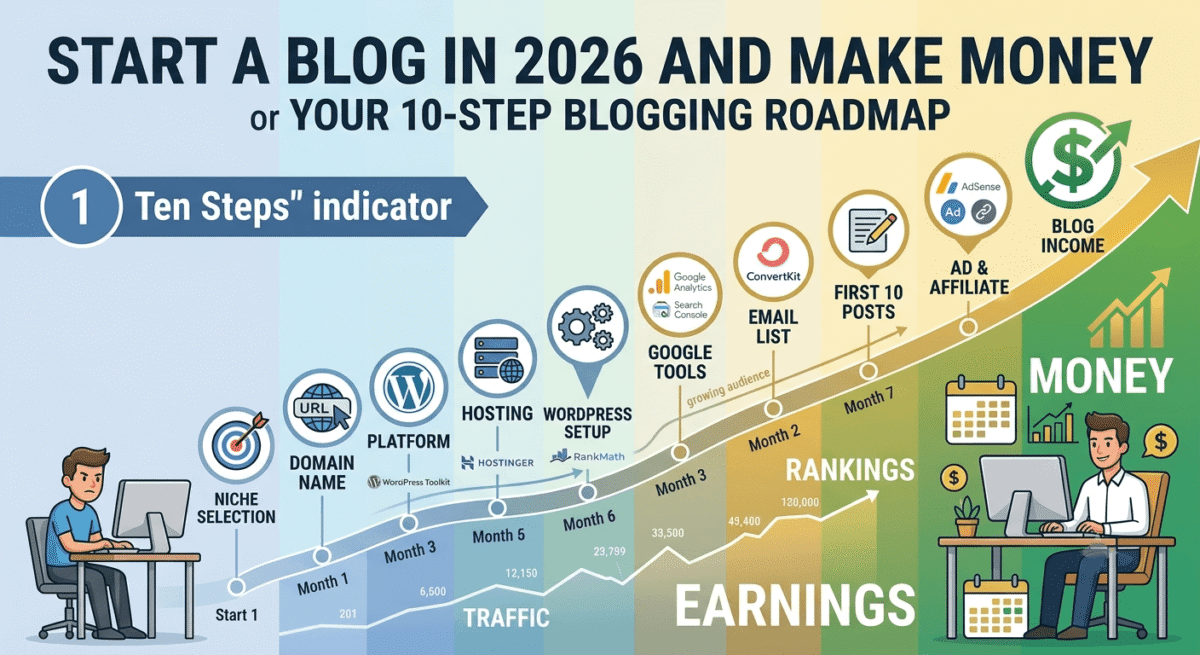
Starting a blog in 2026 is one of the most accessible ways to build a genuine income from the internet, but only if you do it correctly from the beginning.
The bloggers who fail spend months writing content nobody finds, choose the wrong niche, use free platforms that limit their monetization options, and give up before their site has had enough time to build authority and traffic.
The bloggers who succeed choose a niche with proven monetization potential, build their site on a professional platform from day one, write content that targets what people are actively searching for, and treat their blog as a business rather than a hobby.
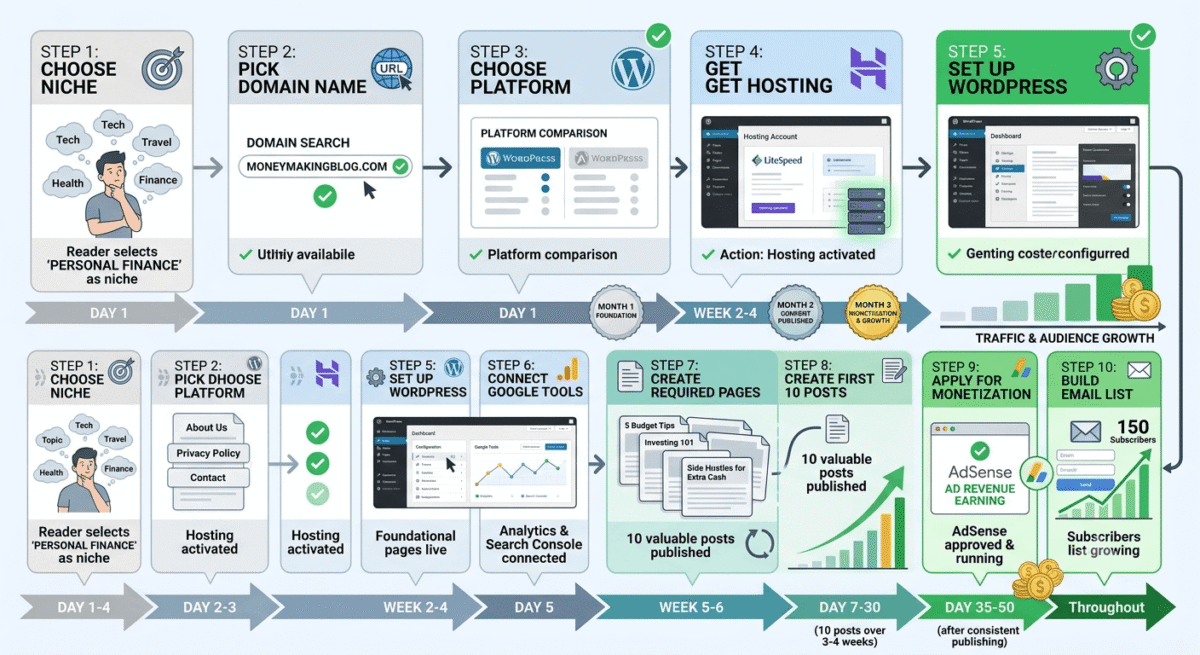
This guide covers every step of starting a profitable blog in 2026, or how to start a Blog from choosing your niche to earning your first dollar. I have tested every tool and strategy mentioned here on real blogs. Nothing here is theoretical.
Table of Contents
Step 1: Choose a Niche That Can Actually Make Money
The single most important decision in starting a blog is your niche. Not your writing style. Not your platform. Not your domain name. Your niche determines your ceiling.
A niche is a specific topic area your blog covers, narrow enough that you can establish authority, broad enough that there are enough readers and enough products to monetize.
The Three Requirements of a Profitable Niche
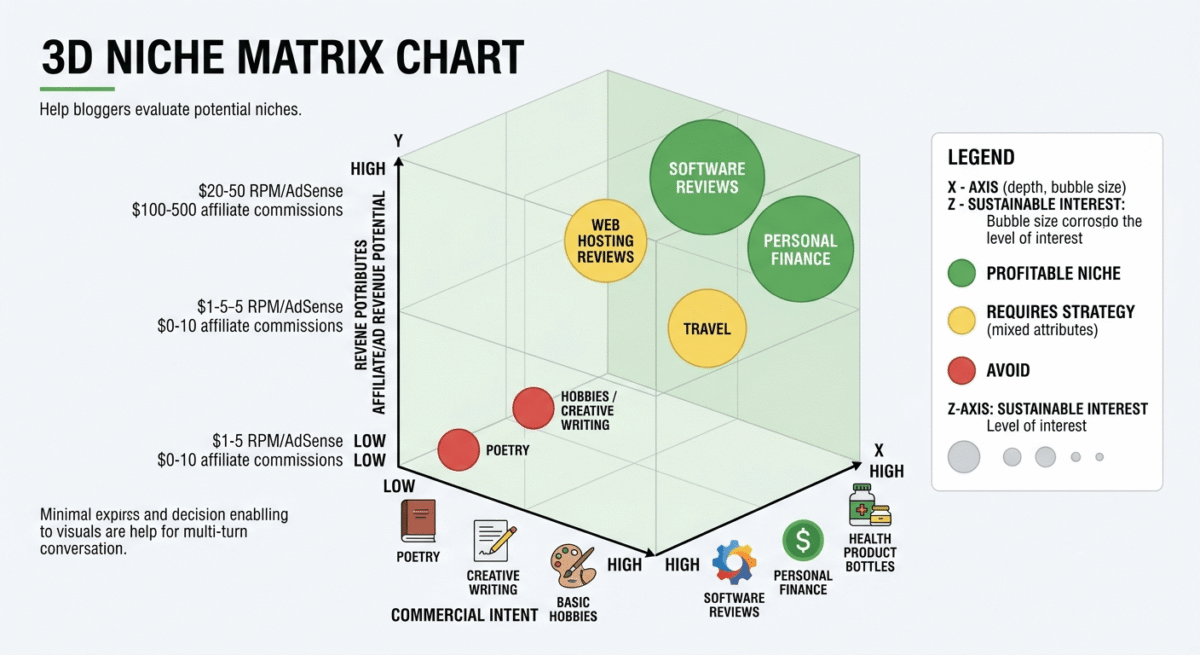
Requirement 1: Commercial intent. Readers in your niche must be willing to spend money on products related to your topic. Readers who search “best VPN for streaming” are ready to buy a VPN. Readers who search “best poems about autumn” are not typically buying anything. High commercial intent niches include: software and technology, personal finance, health and fitness, business tools, travel, and education.
Requirement 2: Affiliate or advertising revenue potential. Profitable niches have either high-paying affiliate programs (software pays $50–$500 per referral, finance pays $100–$1,000 per referral) or high AdSense RPM (software/tech earns $15–$40 per 1,000 visitors). Avoid niches where products are low-priced, affiliate programmes do not exist, or AdSense RPM is under $5.
Requirement 3: Sustainable interest. You will write 50–100 posts about this topic over the next year. Choose a niche you find genuinely interesting, not just commercially appealing. Bloggers who choose niches purely for money and have no real interest in the topic consistently fail, the writing quality suffers, the authentic voice is absent, and motivation collapses.
High-Potential Niches for 2026
Niche | Avg. Affiliate Commission | AdSense RPM | Competition |
Software reviews | $50–$500/signup | $15–$40 | Medium |
Personal finance | $50–$500/referral | $20–$50 | High |
Web hosting | $65–$200/signup | $10–$25 | Medium |
Cybersecurity | $30–$80/signup | $15–$35 | Medium |
Online education | $50–$200/signup | $10–$20 | Medium |
Travel | Variable | $8–$20 | High |
Health and wellness | $20–$100/signup | $10–$30 | High |
The recommendation for 2026: Software reviews and comparisons, medium competition, high affiliate commissions ($50–$500), high AdSense RPM ($15–$40), and growing demand as more people evaluate SaaS tools for their businesses.
Step 2: Pick Your Domain Name
Your domain name is your blog’s permanent address. Changing it later is painful and SEO-damaging, choose carefully from the start.
Domain Name Rules
Keep it short. Under 15 characters is ideal. Under 20 is acceptable. Longer than 25 is too long.
Make it memorable. Can someone hear your domain name once and remember it? “RateTheTool.com”, yes. “BestSoftwareReviewsAndComparisons.com”, no.
Use .com. Despite the proliferation of new extensions (.io, .blog, .co), .com remains the most trusted globally. When in doubt, use .com.
Avoid hyphens and numbers. “Best-Software-Reviews.com” looks spammy. “Review2026.com” dates immediately.
Make it brandable. The best domain names suggest the topic without being keyword-stuffed. “RateTheTool.com” implies review and rating without being “BestToolReviews.com.”
Where to Buy Your Domain
Purchase your domain from Namecheap ($8–$12/year for .com) or directly through Hostinger when you buy your hosting plan (Hostinger includes a free domain with Premium and Business plans).
Step 3: Choose the Right Blogging Platform
This decision determines your flexibility, monetization options, and long-term potential. In 2026, there are two categories:
Option A: WordPress.org (Recommended)
WordPress.org is free, open-source blogging software that you install on your own hosting. It powers 43% of all websites on the internet, from personal blogs to major media publications.
Why WordPress.org is the right choice for monetized blogs:
- Complete control over your site, no platform restrictions on monetization
- Full AdSense compatibility, place ads anywhere without restrictions
- Complete affiliate marketing flexibility, any link structure, any tool
- 60,000+ free plugins for any functionality you need
- Own your content completely, no platform can shut you down or change your business model
- Best SEO control via Rank Math plugin
The trade-off: You are responsible for your own hosting, security, updates, and backups, manageable tasks for most bloggers, especially with the right plugins.
Option B: Hosted Platforms (Wix, Squarespace, WordPress.com)
These platforms handle technical management but restrict monetization in important ways, WordPress.com’s free and personal plans do not allow AdSense, Wix limits where ads can be placed, and none provides the affiliate link management flexibility of self-hosted WordPress. See our Wix vs Squarespace vs WordPress comparison for the full breakdown of why WordPress.org wins on monetization even though it takes more setup.
For a blog built to generate income through AdSense and affiliates, WordPress.org is the only correct choice.
Step 4: Get Hosting, The Foundation of Your Blog
Web hosting is the server where your WordPress site lives. Your hosting provider determines your site’s speed, uptime, and security, all of which affect both your user experience and your Google rankings.
Recommended Hosting: Hostinger Premium
Price: $3.99/month (introductory, 48-month plan) | $7.99/month renewal
Included: Free domain (1 year), free SSL, 100 websites, 100GB SSD storage, weekly backups
Hostinger is the best web hosting for new bloggers in 2026. Here is why specifically:
LiteSpeed servers. LiteSpeed is the fastest web server technology currently available for WordPress sites, faster than Apache (used by Bluehost) and faster than most competitors at equivalent price points. Faster hosting means better Core Web Vitals scores, which directly affects Google rankings.
Transparent renewal pricing. Hostinger’s renewal price ($7.99/month) is competitive, unlike Bluehost (renews at $10.99/month) or SiteGround (renews at $17.99/month), Hostinger does not dramatically increase prices after the introductory period. “See our full Hostinger vs Bluehost vs SiteGround.
hPanel. Hostinger’s custom control panel is simpler and more beginner-friendly than traditional cPanel, WordPress installation is a single click.
Hosting Setup (15 minutes)
- Go to hostinger.com → select Premium Web Hosting plan
- Register your domain (or connect an existing one)
- Complete payment → log into hPanel
- Websites → Add Website → WordPress → one-click installation
- Set admin username (not “admin”), strong password, and your email
- hPanel → PHP Configuration → set to PHP 8.2+
- hPanel → SSL → activate free SSL certificate
Your WordPress blog is now live at https://yourdomain.com.
Step 5: Set Up WordPress Correctly
The first 30 minutes in your WordPress dashboard determine how well your blog performs for the next year. Do not skip these settings.
Essential WordPress Settings
Settings → Permalinks: Select “Post name”, this creates SEO-friendly URLs like yourdomain.com/best-vpn-2026/ instead of yourdomain.com/?p=123. This single setting has a significant impact on your SEO from day one. Do this before publishing any content.
Settings → Reading: Uncheck “Discourage search engines from indexing this site”, new WordPress installations have this checked by default. It prevents Google from finding your entire blog until unchecked.
Settings → Discussion: Uncheck “Allow people to post comments”, disabling comments prevents spam and reduces maintenance burden while your blog is growing.
Settings → General: Set your site title, tagline, timezone, and admin email.
Install Your Theme
Install Astra (free), the fastest, most lightweight WordPress theme available. Go to Appearance → Themes → Add New → search “Astra” → Install → Activate.
Astra loads in under 500ms on Hostinger’s LiteSpeed servers, faster than most paid themes and significantly faster than bloated themes like Divi or Avada.
Install Essential Plugins (In This Order)
Install only these 8 plugins on launch day:
Plugin | Purpose | Cost |
Rank Math SEO | SEO, schema, sitemap | Free |
LiteSpeed Cache | Performance and caching | Free |
Imagify | Image compression | Free tier |
Wordfence Security | Firewall and malware scanning | Free |
UpdraftPlus | Automated backups | Free |
MonsterInsights | Google Analytics 4 connection | Free |
ThirstyAffiliates | Affiliate link management | Free |
WPForms Lite | Contact form | Free |
Every additional plugin adds load time and potential conflicts. Start with 8. Add more only when you have a specific need. Once your blog grows past the basics, see our roundup of essential WordPress plugins for what to add next.
Create Required Pages
Before publishing your first post, create these four pages:
About page: Who you are, your blogging experience, your review methodology, and your editorial independence statement. Google’s quality reviewers look at About pages to assess site credibility.
Privacy Policy: Required for AdSense approval and legally required in many jurisdictions. Include disclosure of Google Analytics, AdSense cookies, and affiliate relationships.
Contact page: Working contact form (WPForms). Required for AdSense approval.
Homepage: A static homepage showing your blog’s purpose and linking to your main content categories.
Step 6: Connect Google Tools
Google Search Console (Day 1, Free)
- search.google.com/search-console → Add property → Domain → enter yourdomain.com
- Verify via DNS record in Hostinger hPanel
- Rank Math → General Settings → connect to Search Console
- After verification: Sitemaps → submit yourdomain.com/sitemap_index.xml
Search Console shows you which keywords your pages rank for, your average position, click-through rates, and any technical indexing issues. It is the most important free SEO tool available.
Google Analytics 4 (Day 1, Free)
- analytics.google.com → Create account and GA4 property
- Copy your Measurement ID (G-XXXXXXXXXX)
- MonsterInsights → Settings → paste Measurement ID
- Verify data is flowing in GA4 real-time report
Bing Webmaster Tools (Day 1, Free)
- bing.com/webmasters → Sign in → Add site
- Import from Google Search Console (one click)
Bing powers Microsoft’s search engine and Perplexity AI, submitting here gets your content indexed by AI search engines faster.
Step 7: Create Your First 10 Blog Posts
Content is where most new bloggers fail, not because they write badly, but because they write about the wrong things.
The Keyword Research Process
Every blog post should target a specific keyword that people are actively searching for. Writing without keyword research is the single most common reason blogs fail to generate traffic.
Free keyword research workflow:
- Go to Google and type your topic + a space, note the autocomplete suggestions (real searches)
- Search the term → scroll to “People also ask” and “Related searches” at the bottom
- Check search volume at Ubersuggest.io (free) or Keywords Everywhere Chrome extension
Paid keyword research (when you are ready): Semrush’s Keyword Magic Tool surfaces thousands of related keywords with search volume, difficulty scores, and CPC data, the most comprehensive keyword research available. See our Ahrefs vs Semrush vs Moz comparison for how Semrush stacks up against the other leading paid options.
What to Write About
For a software review blog, the most consistently high-traffic post format is comparison posts: “Best [Tool Category] in 2026: [Tool A] vs [Tool B] vs [Tool C].”
These posts work because:
- Clear commercial intent, people searching for tool comparisons are evaluating purchases
- Three tools = three keyword variations that can all drive traffic
- Easy to structure, proven format readers trust
- Natural affiliate link placement, you recommend the best tool, readers click to purchase
Your first 10 posts should cover the highest-traffic software categories:
- Best web hosting (50,000–60,000 monthly searches)
- Best password managers (25,000 monthly searches)
- Best VPN (18,000 monthly searches)
- Best antivirus software (28,000 monthly searches)
- Best email marketing software (35,000 monthly searches)
- Best project management tools (40,000 monthly searches)
- Best SEO tools (32,000 monthly searches)
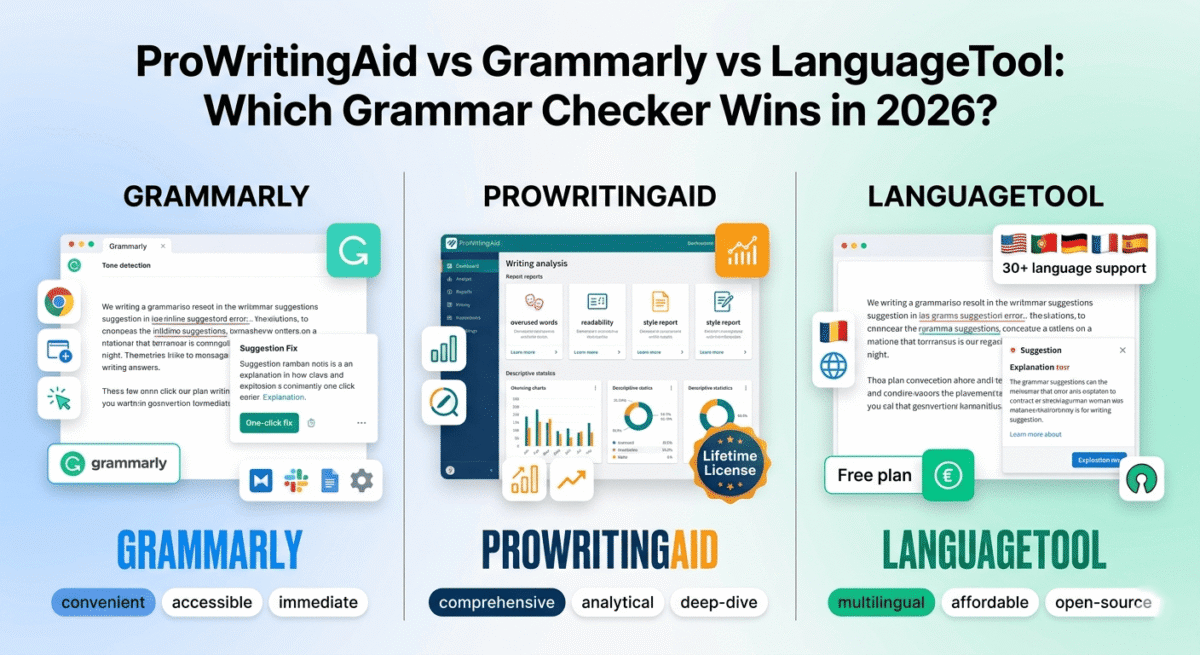
- Best grammar checkers (20,000 monthly searches)
- Best cloud storage (22,000 monthly searches)
- Best CRM software (48,000 monthly searches)
Post Structure That Ranks
Every post should follow this structure:
- Introduction (150–200 words), address the reader’s problem directly
- How We Tested, establish credibility with your evaluation criteria
- Tool 1 Review, what it does best, where it falls short, pros/cons, rating/5
- Tool 2 Review, same structure
- Tool 3 Review, same structure
- Comparison Table, all tools side by side (rich result eligible)
- Which Should You Choose, decision guide by use case
- Final Verdict, clear winner with overall ratings
- FAQ Section, 7–8 questions, 40–60 words each (featured snippet optimised)
- Affiliate Disclosure, required by FTC and affiliate programs
Target length: 2,500–3,200 words. Long-form content ranks higher and provides more value.
Step 8: Optimise Every Post for SEO
On-Page SEO Checklist (Per Post)
Run through this for every post before publishing:
- [ ] Target keyword appears in: title, first paragraph, at least one H2, meta description, URL slug
- [ ] Meta description written (under 160 characters), written to maximise click-through, not just include keywords
- [ ] URL slug matches target keyword exactly (best-web-hosting-2026)
- [ ] Featured image uploaded (1200×630px) with descriptive alt text
- [ ] All body images have alt text
- [ ] Rank Math score: 80+ (aim for green)
- [ ] FAQ schema block added at bottom (Rank Math FAQ block)
- [ ] 2–3 internal links to related posts
- [ ] Affiliate links use ThirstyAffiliates cloaked URLs with rel=”nofollow sponsored”
- [ ] After publishing: submit URL in Google Search Console → URL Inspection → Request Indexing
Rank Math Configuration
Rank Math is the best free SEO plugin for WordPress, install it before publishing your first post.
Setup wizard: Connect to Google Search Console → select “Blog” site type → enable modules: SEO Analysis, Sitemap, Schema, Redirections.
Schema setup: Rank Math → Titles → Posts → Schema Type → Article. This applies Article schema to all posts automatically.
FAQ schema: On each post, add the Rank Math FAQ block at the bottom and enter your FAQ questions and answers. This creates FAQ rich results, your questions appearing directly in Google search results, above regular listings.
Step 9: Build Your Email List From Day One
Your email list is the only audience you truly own. Social media followers can disappear overnight when algorithms change. Search rankings can fluctuate. But your email list is yours regardless of what any platform decides.
Email Marketing Setup
ConvertKit is the best email marketing platform for bloggers, free for up to 10,000 subscribers, with unlimited email sends and landing pages on the free plan. See our Mailchimp vs ConvertKit vs Brevo comparison if you want to weigh ConvertKit against the alternatives before committing.
- Create your ConvertKit account at convertkit.com (free)
- Install the ConvertKit WordPress plugin
- Create your first opt-in form
- Add the opt-in form to: your blog’s sidebar, the end of every post, and a dedicated landing page
Creating Your Lead Magnet
A lead magnet is a free resource readers get in exchange for their email address. The most effective lead magnets for software review blogs:
- “The Ultimate Software Toolkit for Bloggers”, a PDF listing the 20 best tools for bloggers with your assessment of each
- “Free vs Paid: Which Software Tools Are Actually Worth Paying For”, a cheat sheet comparing free and paid options in key categories
- “The WordPress Launch Checklist”, a downloadable checklist for setting up a new WordPress blog
Create your lead magnet in Canva (free) → upload to ConvertKit → set up automated delivery when someone subscribes.
Step 10: Monetize Your Blog
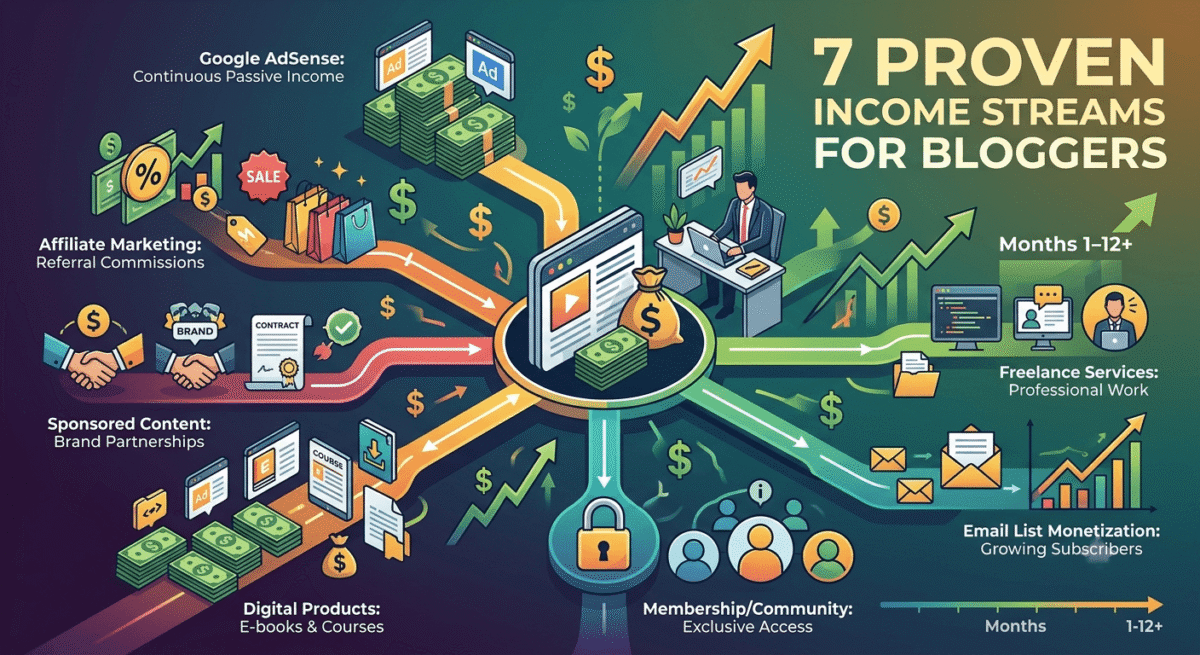
Monetization Stream 1: Google AdSense
AdSense displays Google ads on your blog and pays you when readers view or click them. In the software and technology niche, RPM (revenue per 1,000 visitors) ranges from $15–$40, among the highest of any blog niche. This section covers the fundamentals, for the full picture of all seven income streams bloggers stack together, see our complete guide on how to make money blogging.
How to apply:
- Publish at least 15–20 posts over 3–4 weeks consistently
- Ensure your Privacy Policy, Contact page, and About page are live
- Visit adsense.google.com → apply with your domain
- Add the AdSense code via Insert Headers and Footers plugin
- Wait 1–14 days for approval
Upgrade path: Once you reach 50,000 sessions/month, apply to Mediavine, their RPM is 3–5x higher than AdSense for the same traffic.
Monetization Stream 2: Affiliate Marketing
Affiliate marketing pays you a commission when a reader clicks your link and purchases a product. In software reviews, commissions range from $20 to $500 per signup.
How it works:
- Join affiliate programs for the tools you review (all free to join)
- Get your unique affiliate link from each program
- Add the link to ThirstyAffiliates → creates a cloaked link (yourdomain.com/go/toolname)
- Insert the cloaked link in relevant posts
- Earn commission when readers click and purchase
Priority affiliate programs to join immediately:
- Semrush, 40% recurring lifetime commission
- Hostinger, up to $150 per signup
- NordVPN, 40% + 30% recurring
- HubSpot, up to $500 per signup
- Shopify, $150 per merchant
One critical rule: Always disclose affiliate relationships. Add a disclosure at the top of every post that contains affiliate links: “This post contains affiliate links. If you purchase through our links, we earn a commission at no extra cost to you.”
Monetization Stream 3: Digital Products (Month 6+)
Once you have an email list and established traffic, creating digital products provides income that is not dependent on clicks or commissions:
- Ebooks: “The Complete Guide to Choosing the Right Software Stack for Your Business”, priced at $27–$97
- Email courses: A 5-day email sequence teaching readers how to set up a blog, priced at $47–$97
- Consulting: WordPress setup and blog launch consulting for readers who want done-for-you implementation, priced at $150–$500/hour
Realistic Income Timeline
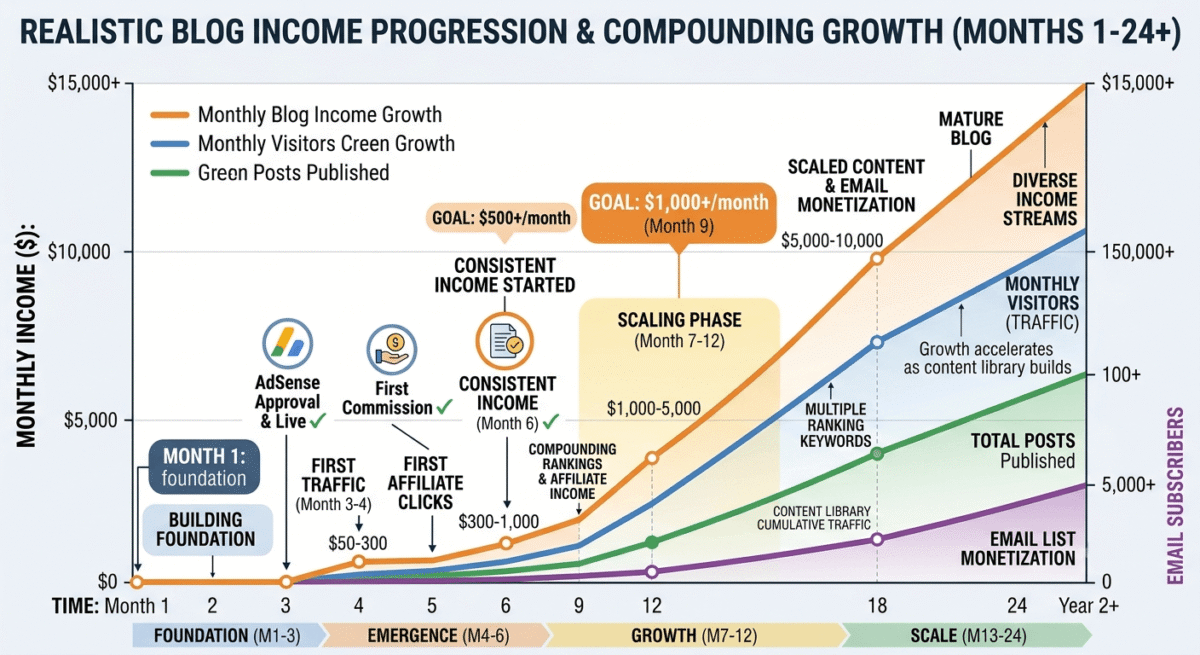
Timeframe | Monthly Visitors | Monthly Income | Primary Source |
Month 1–2 | 0–500 | $0 | Building content |
Month 3–4 | 500–2,000 | $50–$300 | First AdSense + affiliate clicks |
Month 5–6 | 2,000–10,000 | $300–$1,000 | Multiple rankings, consistent affiliates |
Month 7–12 | 10,000–50,000 | $1,000–$5,000 | Compounding affiliate income |
Year 2+ | 50,000–150,000 | $5,000–$15,000 | Mediavine + affiliates + products |
The honest truth about timeline: Most bloggers see their first meaningful traffic in month 3–4, their first affiliate commissions in month 4–5, and consistent income beginning in month 6. Bloggers who quit before month 6 represent the vast majority of people who start blogs and never earn from them. The difference between success and failure is almost always consistency over the first six months.
The Daily Action Plan for Your First 90 Days
Days 1–7: Foundation
- [ ] Choose niche and domain name
- [ ] Purchase Hostinger hosting and domain
- [ ] Install WordPress, Astra theme, and 8 essential plugins
- [ ] Create About, Privacy Policy, Contact, and Homepage pages
- [ ] Set up Google Search Console and Google Analytics 4
- [ ] Set up ConvertKit email marketing account
- [ ] Join top 5 affiliate programs (Semrush, Hostinger, NordVPN, HubSpot, Shopify)
Days 8–30: Content Building
- [ ] Publish 1 post per day (or 5 per week minimum)
- [ ] Follow the exact post structure for every post
- [ ] Complete Rank Math SEO checklist for every post
- [ ] Submit each post URL to Google Search Console
- [ ] Share each post on Pinterest and LinkedIn
Days 31–60: Optimising and Applying
- [ ] Apply for AdSense after 15+ posts are published for 4+ weeks
- [ ] Review Google Search Console, which posts have impressions? → update and improve them
- [ ] Add internal links between related posts
- [ ] Join remaining affiliate programs (weeks 2–4 list)
- [ ] Create your first lead magnet and set up email opt-in
Days 61–90: Growing
- [ ] Continue publishing daily
- [ ] Update any posts where Google is showing impressions but low click-through (improve titles and meta descriptions)
- [ ] Start building backlinks, leave genuine, helpful comments on related blogs, pitch guest posts to relevant sites
- [ ] Review affiliate click data in ThirstyAffiliates, which links get the most clicks? → ensure they are prominently placed
Common Mistakes to Avoid
Mistake 1: Choosing a niche based on passion alone. You need to enjoy the topic AND the topic needs to be commercially viable. “My favourite recipes” has passionate writers but poor monetization. “Best meal kit delivery services” has commercial intent.
Mistake 2: Starting on a free platform. WordPress.com free, Blogger, or Wix free plans restrict your monetization options. Start on WordPress.org with your own hosting, the $4–$8/month cost is the lowest-barrier business investment you will ever make.
Mistake 3: Writing without keyword research. Every post needs to target a specific keyword that people are actively searching. Write for search intent, not for your own interests.
Mistake 4: Publishing thin content. Posts under 1,000 words rarely rank. Target 2,500–3,200 words per comparison post. More depth = more ranking opportunities = more traffic.
Mistake 5: Quitting too early. Google takes 3–6 months to rank new content. Bloggers who quit after 2 months of no traffic quit 1–4 months before their first page-1 rankings. Consistency over the first 6 months is the single most important factor in blogging success.
Mistake 6: Not building an email list from day one. Every month you delay email list building is a month of compounding growth you cannot recover. Even 100 email subscribers can generate meaningful income through affiliate promotions.
Mistake 7: Ignoring affiliate disclosures. FTC requires disclosure of affiliate relationships on every page that contains affiliate links. Non-compliance risks legal issues and can get you removed from affiliate programs. Add a disclosure, it takes 30 seconds.
Frequently Asked Questions
How much does it cost to start a blog in 2026?
Starting a professional WordPress blog costs approximately $50–$100 for the first year. Hostinger Premium hosting: $47.88/year (at $3.99/month). Domain name: $12/year (or free with Hostinger Premium). All essential plugins are free. Total first-year cost: approximately $60 if you get the domain free with Hostinger, $72 if purchased separately. Everything else, WordPress, Astra theme, Rank Math, Wordfence, UpdraftPlus, MonsterInsights, ThirstyAffiliates, WPForms Lite, is completely free.
How long does it take to make money blogging?
Most bloggers earn their first money from AdSense or affiliate marketing between months 3–5. Consistent income over $500/month typically begins around month 6–9 for bloggers who publish consistently and follow keyword research-driven content strategy. Full-time income ($3,000–$5,000/month) is typically achievable by month 12–18 with consistent effort. These timelines assume publishing at least 3–4 posts per week and following the SEO and monetization strategies in this guide.
Do I need technical skills to start a blog?
No. WordPress is designed for non-technical users, creating posts, adding images, and managing basic settings requires no coding knowledge. The plugins recommended in this guide (Rank Math, LiteSpeed Cache, UpdraftPlus) are configured through simple dashboards with no code editing. Basic technical skills, copying and pasting code snippets, following step-by-step installation guides, are sufficient. If you are comfortable using a smartphone, you are technically capable of running a WordPress blog.
What is the best niche for blogging in 2026?
Software reviews and comparisons offer the best combination of affiliate commission potential ($50–$500 per signup), AdSense RPM ($15–$40), medium competition (you can rank without a massive existing domain authority), and growing demand (more people evaluate SaaS tools as software usage expands). Personal finance and cybersecurity are also strong niches. Avoid niches with no commercial intent (poetry, creative writing) or extremely high competition with established authoritative sites (general news, celebrity gossip).
How many posts do I need before applying for AdSense?
Google does not publish a specific minimum post count, but most bloggers report approval with 15–25 published posts that are at least 1,000 words each, published consistently over at least 4 weeks, with a functioning About page, Privacy Policy, and Contact page. The quality and original value of your content matters more than the exact count. Thin, unoriginal posts are rejected regardless of how many there are.
Can I blog while working full-time?
Yes, many successful bloggers start while working full-time. The minimum viable investment is 10–15 hours per week: one 2,500-word post takes approximately 3–4 hours to research, write, and publish with SEO optimisation. Three posts per week = 9–12 hours of writing time, plus occasional hours for keyword research, site maintenance, and social sharing. Many bloggers start on weekends and evenings, then transition to full-time blogging once income reaches their target.
Should I start multiple blogs or focus on one?
Focus on one blog, especially in the first year. Building a blog to meaningful income requires consistent effort over 6–18 months. Splitting that effort across multiple blogs almost always results in two mediocre blogs instead of one successful one. Once your first blog generates consistent income and requires less active effort to maintain, starting a second blog in a complementary niche makes sense.